Use the Content Calendar inside BrandWell to create content on a certain day in the future, and keep track of your publishing schedule.
Getting Started
Content Calendar is a tab inside your BrandWell project.

Not sure how to create a project?
Content Calendar makes it easy to collaborate with your writers.
Let's dive in.
![[object Object]](https://cdn.jsdelivr.net/emojione/assets/3.1/png/32/1f449.png) Create a task for your writer and save it to the calendar
Create a task for your writer and save it to the calendar

Click the "More Options" button and scroll down to see the tags and assignees boxes.
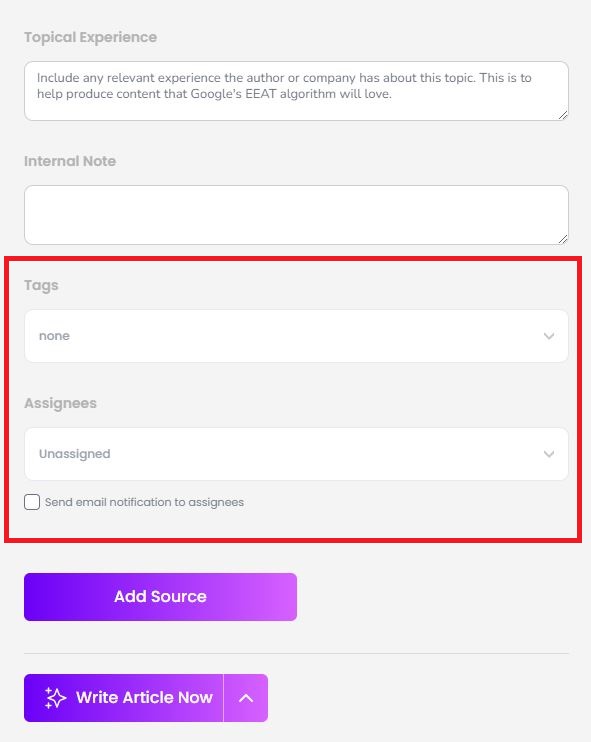 You can choose an
assignee(s) when working collaboratively. This user will receive a notification when you mark the "send email" checkbox.
You can choose an
assignee(s) when working collaboratively. This user will receive a notification when you mark the "send email" checkbox.

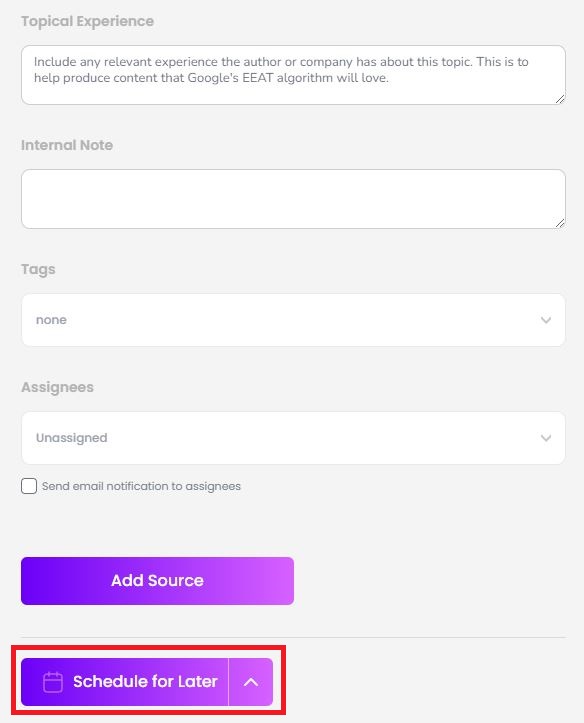
Click the arrow button next to "Write Article Now," and select "Schedule for Later." This will open a calendar, which allows you to decide the date and time for the scheduled post.

Click "Schedule for Later," and the post will be added to your Content Calendar.
Calendar view: Upon clicking 'Schedule for Later,' you will be directed to the calendar view on the next page. You will immediately see all the content you choose to save on the content calendar.
Also, you can access it at any time by clicking the
"Content Calendar" tab button (third tab) on your project dashboard.

To access the posts you've scheduled in the calendar, simply hover over the desired date and click on the corresponding post. You will then be presented with options to edit, remove assignees, add or remove tags, adjust the date, and, finally, add or modify any existing notes.

Additionally, you have the option to generate a topic report upon opening the content or to remove it from the calendar.

How do I view my scheduled content in the calendar?
To view your scheduled content from inside the Content Calendar, click the "Content Calendar" tab on your project dashboard.
Yes.


