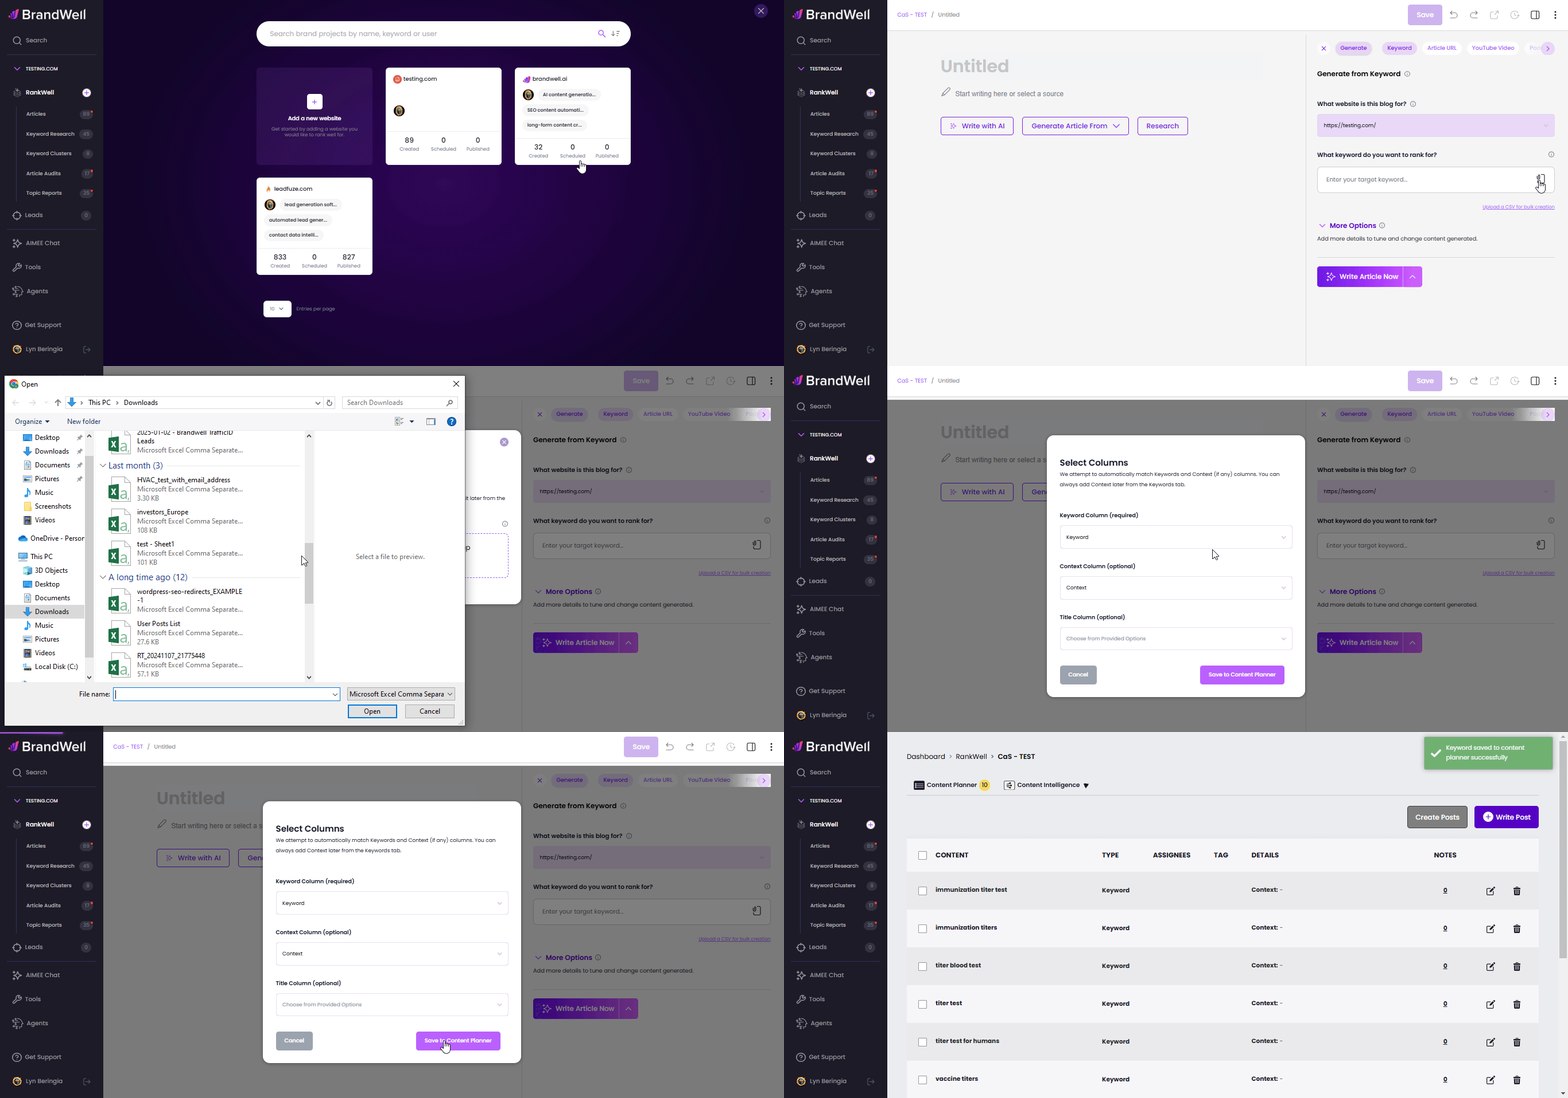
After creating a project, the Content Overview dashboard will automatically open.
Then, find the "Write New Post" button at the top right of a project's page.
Once you click "Write New Post" the following menu will appear. Select "Keyword".
Then, click on the clip icon next to the first box on the left.
A new box will appear.
Hit "Click to Upload" to find the .csv file you'll upload to BrandWell.
Here's a sample CSV file.
NOTE: You can include either one, two, or three columns in your file. One column (required) is for the keywords. The second (optional) column is for the context of each keyword. The third (also optional) column is for the title. This is useful when you know what title you want to see from the AI output.
Once you upload a file, you'll be prompted to approve it. If you've included the top additional (optional) columns of context and title, then make sure you've made those corresponding selections. Click Save to Content Planner.
In the Content Planner, you'll see all of the keywords listed, along with any context you gave for those keywords (if any).
-
The trash can icon allows you to delete unwanted keywords.
-
As you check keywords (on the left), this icon tallies the number of keywords you'll have the AI write. Click "Create Post" when ready to bulk run your keywords.
In the Content Planner, you can click the Edit icon to the right of each keyword and it will open up the ability to change the keyword and add context.
To access the Content Planner, just click "Topic Reports" from the left side menu.


